The Contacts and Contracts features in ISMS.online make it easy for teams to collaborate on managing relationships with customers, suppliers, and partners. You can capture key interactions, upload documents, set tasks, and stay aligned with your team every step of the way.
Working with Contacts
Creating a New Contact
- Go to Accounts and select an account.
- Click on the Contacts tab.
- Click Create new Contact.
- Enter the contact details in the form provided.

Recording Interactions
Use the Notes area to log updates and interactions. This helps keep your team informed and ensures everyone has access to the latest information.
- Select the interaction type (e.g., meeting, call, email).
- Notify team members in real time if needed.
- Paste emails into contact notes for a clear audit trail.
- Take live notes during phone calls to avoid duplicating work later.

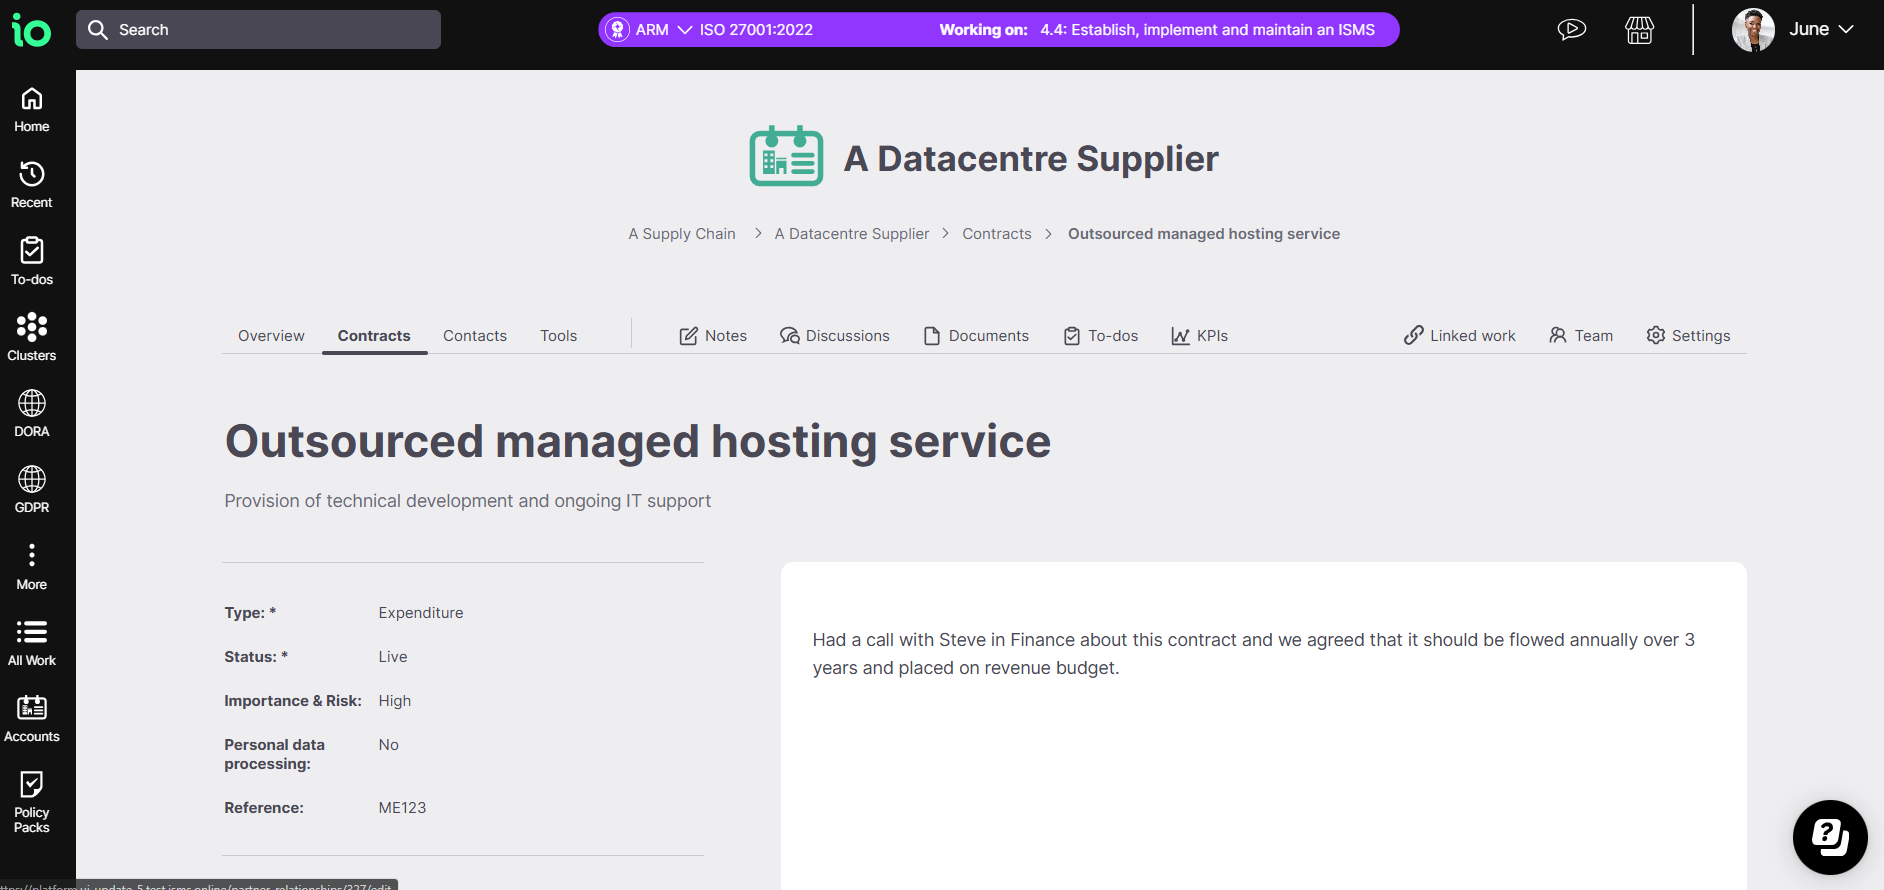
Key Features of Contracts
- Standardised contract details visible in the relevant Account.
- Automatic reminders for contract reviews and renewal planning.
- Upload supporting documents like supplier questionnaires and compliance records.
- Track contract performance using Performance Monitors and tasks.
- See progress updates at a glance through the Notes area.

Accessing Contracts
You’ll find the Contracts tab within each Account. Here you can:
- View all Contracts linked to the Account.
- See them grouped by type: Income, Expenditure, or Non-Financial.
- Check the total value of all Contracts with the organisation.
Viewing and Editing Contracts
Click on a Contract’s name to open its details page. From here you can:
- Edit Contract information.
- Upload supporting documents.
- Create tasks and collaborate with team members.
Creating a New Contract
- In the Contracts area, click New Contract.
- Complete the setup process, which includes three sections: Basics, Management, and Financials (the Financials section appears after completing Basics).
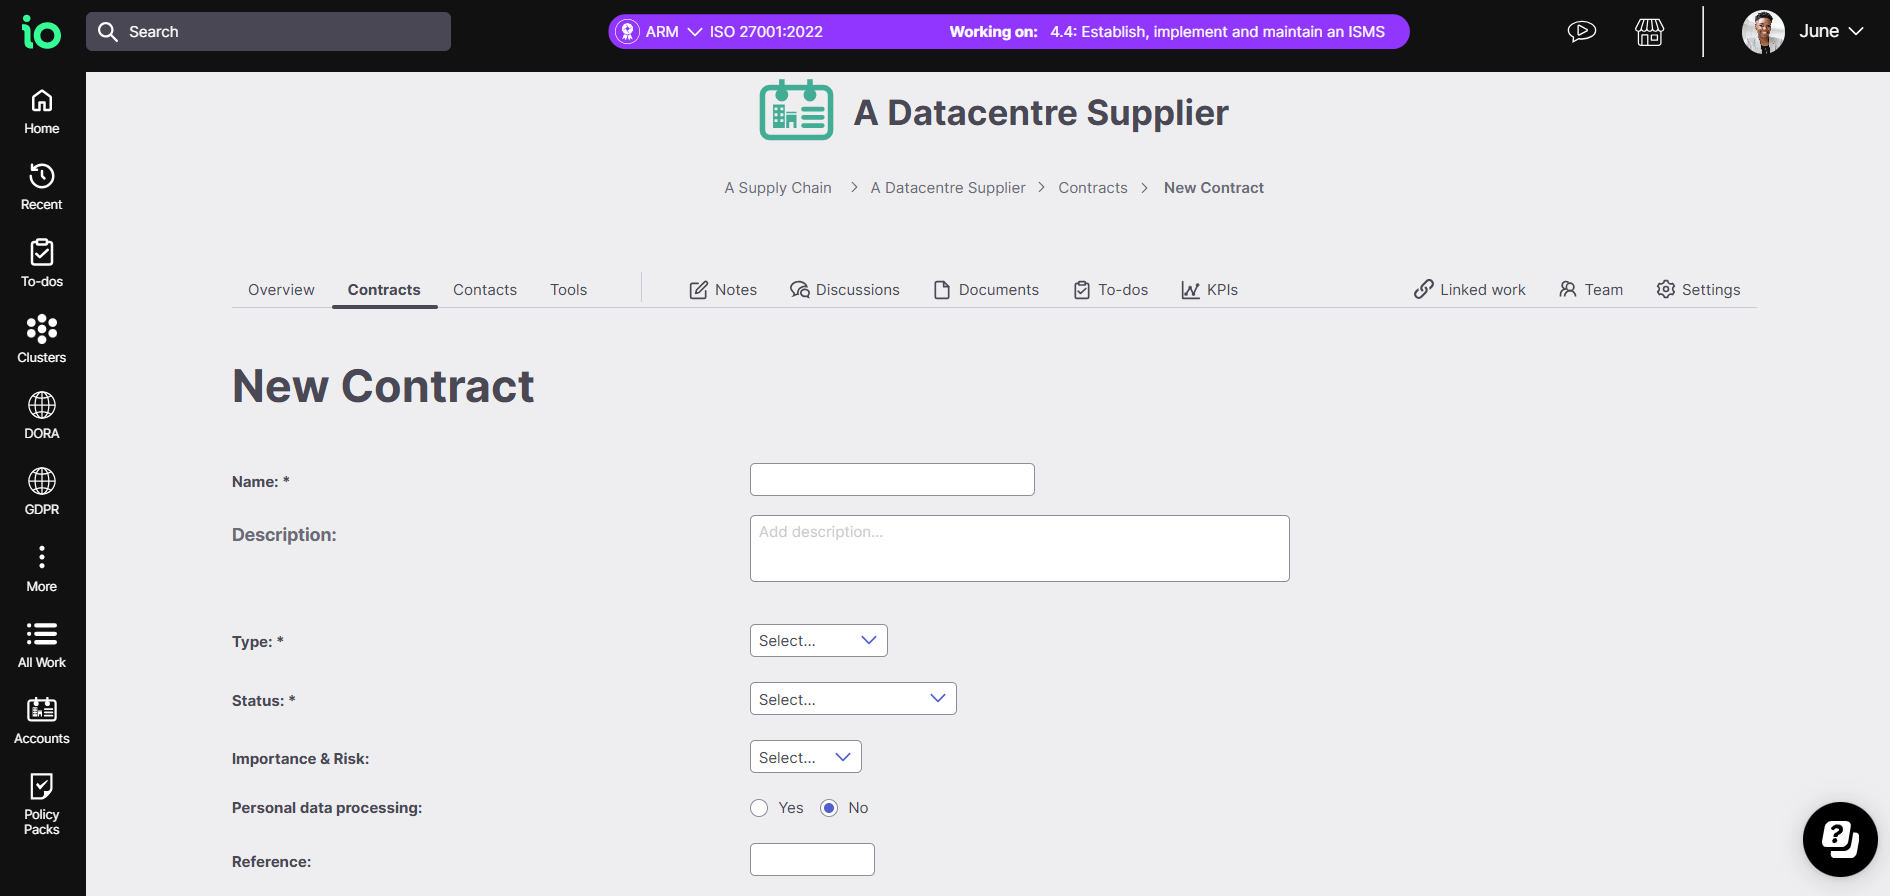
Basics
- Name your Contract and add a brief description (optional).
- Choose a financial type: Income, Expenditure, or Non-Financial.
- Set the current status (e.g., live, ongoing).
- Add start and end dates.
- Assign importance, risk level, and designate leads for both your organisation and the Account’s organisation.
- Enter the notice period if applicable.
Financials
- Record the total value and any further financial details.
Once completed, click the green Create button to save your Contract.