.
To begin:
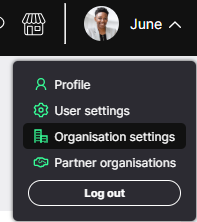
- Click the dropdown menu under your name in the top-right corner of the homepage.
- Select Organisation settings.
- Click on the Users tab.

- Choose Create new user to open the setup form.
Details

2. Entering User Information
Provide the following details:
- Full Name
- Email Address – This is the address the user will use to log in.
If you’re creating a user from a third-party or partner organisation, select the appropriate Partner Organisation from the dropdown list.
Note:
If the partner organisation isn’t listed, you’ll need to add it first.
Email addresses across ISMS.online must be unique. If the address is already in use, you can:
- Request a different address from the user, or
- Use a sub-address format (e.g. jane.doe+yourorg@company.com)
Add the new user’s name and the email address they will be registered with.
If the user you’re creating doesn’t work directly for your organisation and you’re creating them as a partner, locate the Partner Organisation from the dropdown list.
3. Assigning a Role
At this point, you can control what the user will have the power to do on the platform. You should give them either the 'Regular user', 'Occasional user' or 'ISMS.online administrator' role.
Choose the most appropriate role for the user:
ISMS.online Administrator
- Add and manage users
- Edit organisational and user profiles
- Run usage reports
Regular User
- Actively work within the platform
- Create and manage Work areas
- May be assigned administrator status
Occasional User
- Access Work areas with read-only rights
- Cannot create or manage content
Licence Management:
- Regular Users and Administrators count towards your regular licence total.
- Occasional Users are counted separately.
- If your team is growing and you need additional licences, contact your Success Manager or email success@isms.online.
4. Adding the User to Work Areas
After assigning a role, grant the user access to the Work areas they'll need. Every user must be added to the relevant Work areas in order to view or contribute to them.
You can define the type of access for projects as follows:
- Read Only – View only
- Administer – Full management access
- Approve – Ability to approve content
For more information on what these roles entail, see our guide on editing users settings.
Select individual Work areas manually, or use Select all for broader access.
.

To help users get started easily, you can favourite Work areas so they appear on the user’s homepage:
- Expand the relevant Work area section (e.g. Projects)
- Tick the Work areas the user should join
- Tick Favourite on Home to highlight them on the user’s dashboard
You can also assign users to Work areas after their account is created. Learn how here.
Welcome email
5. Welcome Email and Custom Message
By default, ISMS.online sends a welcome email to new users, including a link to set their password.
You may:
- Use the default message
- Add a custom message to provide context, instructions, or direct users to key areas of the system
Note:
The setup link is valid for 14 days. If the user doesn’t activate their account within this time, they’ll need to use the Forgotten Password link to request a new invitation.

6. Final Step – Create the User
Once all details are complete:
- Click Create user
- The user will receive their welcome email immediately
7. Using Single Sign-On (SSO)?
ISMS.online supports SAML-based Single Sign-On, making it easy for users to access the platform using existing corporate credentials. We recommend this for larger organisations seeking a streamlined login process.
Supported Identity Providers:
If your organisation uses one of these providers, follow our SSO setup guide, then share the requested information with our team. We’ll enable SSO on your platform.
Don’t see your provider listed?
We may still be able to support it. Contact support@isms.online with your provider’s name, and we’ll guide you through the process.
Planning to add more users?
If you expect to exceed your current user allocation, please contact our support team in advance. Additional users may incur extra charges depending on your contracted limits.
If you have any questions or need further assistance, please get in touch with our support team at support@isms.online. We're here to help.